
Getting Started with H2
Table of Contents
Introduction


In some of my other recent posts, I use the H2 database engine. It’s a small, fast, self-contained pure-Java relational database engine.
Read all about it here: H2 Database Engine
The Tutorial and Features pages are also great places to start - and keep the Database URL Overview handy - that is probably the one area which may initially confuse new users.
I will walk through the basics of creating a new H2 database on a Windows machine - the commands for Linux are pretty much the same (it’s all Java-based). I will create a “server mode” database, since that is probably the most familiar model for people who have used a more mainstream relational database (Oracle, SQL Server, MySQL, etc.) in the past.
Because H2 is a pure-Java database, I will assume you already have a recent version of Java SE installed, and that you have a %JAVA_HOME% environment variable (for Windows) or $JAVA_HOME (for Linux). There are various ways to install and run Java - all outside the scope of this post.
On the H2 Downloads page, there is a Windows installer which you are welcome to use, but for now we will simply download the self-contained JAR file:
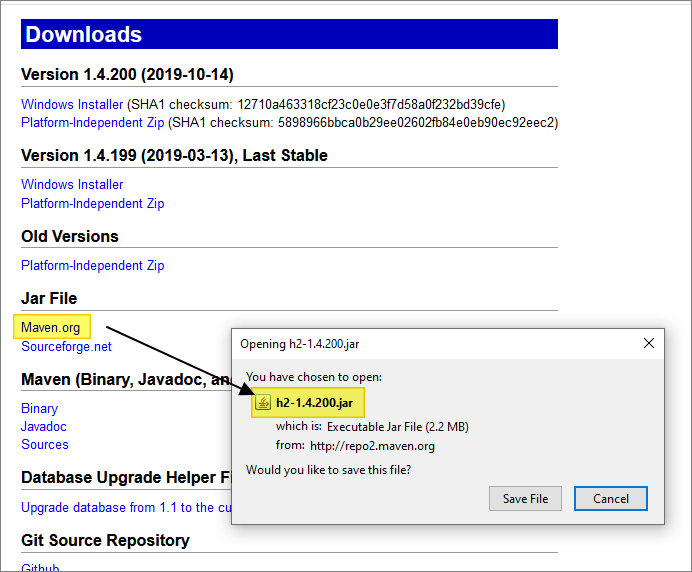
Place the JAR file in a new directory.
Create a New Database
To create a new, empty H2 database, we will use one of the tools bundled with the JAR file.
Open a Windows command prompt and move to your new directory containing the JAR file. Run the following command:
|
|
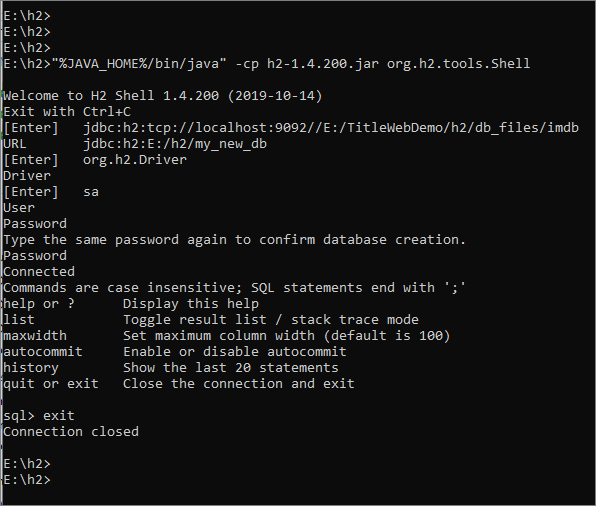
You will be presented with a series of prompts, with default values provided:
URL: ignore the default value (if there is one) and enter the absolute path of the directory, followed by a name for your new database.
Assuming I created my new directory here…
E:\h2
…then my URL will be this:
jdbc:h2:E:/h2/my_new_db
Note the forward slashes, for Java’s benefit.
For all the other prompts you can accept the default value (just hit enter to continue).
At the end of the process you will see a welcome message, and a SQL> prompt. We won’t be using the SQL prompt in this walkthrough, so you can type exit to quit it. You will also see a new file in your directory, with a .mv.db file extension. This is the database.
Here is a complete example:
The H2 DB File Name
As already noted, the above example creates a file called:
my_new_db.mv.db
The .mv part of that name refers to the storage type, used by default, when a new database is created - namely, “MVStore” - or “multi-version store”. You can read all about it here.
This storage structure replaced the previous B-tree based store as of version 1.4.177 (in 2014).
A Note on H2 URLs
The above URL is a file-based URL - you could also have used the following, by including the optional “file:” segment:
jdbc:h2:file:E:/h2/my_new_db
In various H2 examples and tutorials, you may see a URL such as this:
jdbc:h2:~/test
This is another file-based URL, where the tilde (~) stands for your user’s home directory.
For convenience, we created our database using a file-based URL - which created a local database connection. The Shell tool we used also took us to the SQL prompt, so we could do something useful with that connection.
When we exited the SQL shell, we lost our only connection to the database, and the H2 server process terminated.
Below, we will re-start the server, and after that we will re-connect, but this time we will use a TCP-based URL instead of a file-based URL to reconnect. This will give us a remote connection to the database which will then be running in server mode. OK, so in reality our remote database is on our local machine. But the TCP connection can be used from other machines (assuming our machine and port are visible on the network, and we allow H2 to accept remote connections).
This illustrates the point that an H2 database can be run in different modes, with different types of access, based on which URL you use when connecting to the database. With the right URL you can also create an in-memory database (no physical file at all). In this case, a Java program would be responsible for creating the database, which would exist within the same JVM as the Java program. Such a database would cease to exist when the JVM terminated.
Starting the H2 Server Using TCP/IP
At the Windows command prompt, enter the following command to restart the server:
|
|
That -baseDir parameter, and the period following it, are important - they are discussed below.
Two things should happen:
(1) You should see the following output at the command prompt:

The TCP line shows that the H2 server is running on your local machine, on port 9092. The “PG” line refers to the same server but running in “Postgres” mode - we will ignore this. The final line shows that an H2 web-based console has been started for you… which leads to the second thing you should see:
(2) A new web page should have opened in your default browser, showing the H2 console login page. It should look something like this:
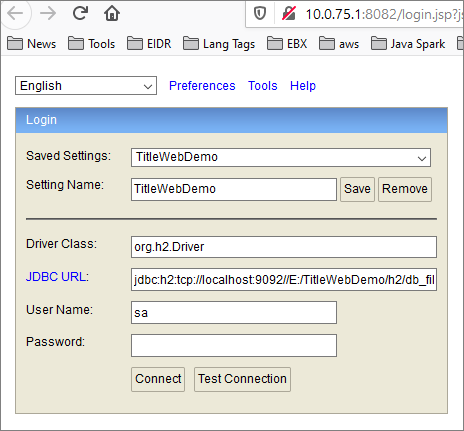
If that did not happen, you can use the URL shown in your command prompt to go to the H2 console.
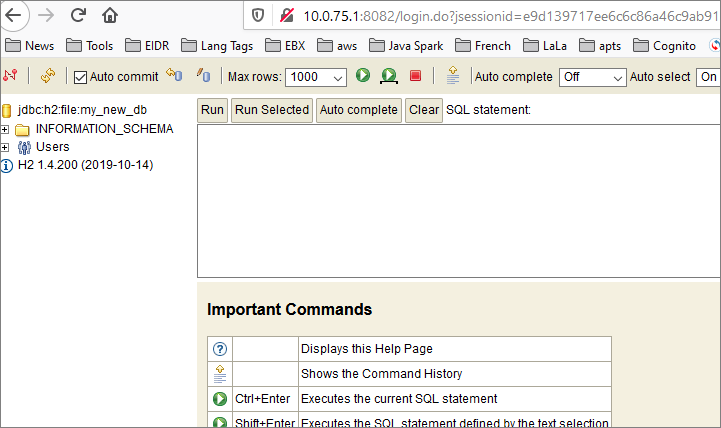
Once you are logged in to the console, you should see something like this:
More Notes on H2 URLs
To use the web console to connect to our new database, we need to provide the correct URL.
(Remember: when we created the database, we specified the user name as “sa” and we chose not to create a password).
We can, in fact, use any of the following URLs to connect:
jdbc:h2:E:/h2/my_new_db
jdbc:h2:file:E:/h2/my_new_db
jdbc:h2:tcp://localhost:9092/my_new_db
That third one is the most interesting: It supports remote access over TCP/IP. You can use it similarly to how you would use any other database URL, via JDBC connectivity, in a Java program. If you do want to connect to an H2 server process from a remote machine, you have to explicitly enable this with the -tcpAllowOthers option. See “Additional Server Start-Up Options” below.
The TCP URL can also be used by SQL client tools such as Aqua Data and Squirrel to access your H2 database schema, using their “generic JDBC” connection options.
And we can even use the following URLs for our own use:
jdbc:h2:my_new_db
jdbc:h2:file:my_new_db
These work because you can use relative file paths in H2 URLs. There is no drive letter, or root directory / at the start of the file path segment of the URL, in these two examples.
But relative to what? In this case, the path is relative to the -baseDir value we provided when we restarted the server, above. The dot (.) we used refers to the directory we were in, when we ran the command to start the server (in my case that was E:\hg).
Additional Server Start-Up Options
There are additional HG server start-up options you can use. To see a list, run the following at a command prompt:
|
|
Or you can read the online documentation.
Stopping the H2 Server
Go back to the command window where you ran the startup command, and type Ctrl-C. That will shut down the server and return you to the command prompt.
What Next?
This post…
…describes how to create a schema in H2, and load a data set into that schema. The data is based on IMDb - so it’s all about movies, TV shows, actors and so on.
In that walkthrough, we use the bundled H2 tool RunScript to run a file of SQL commands which create a schema and load data into the schema from text files. Something like this:
|
|