
Thymeleaf - Two Powerful Features
Table of Contents
Introduction


My demo web application, described here (with source code here), uses Thymeleaf for its HTML template processing.
This is not a Thymeleaf tutorial - there are plenty of those elsewhere - including this one!
Instead, I want to take a closer look at how I used two specific Thymeleaf features. These made Thymeleaf an excellent match for my requirements:
- Template fragments using parameters.
- Pre-processing.
Template Fragments using Parameters
Let’s start with a simple widget - a text input field. Here are two input fields from my demo application:
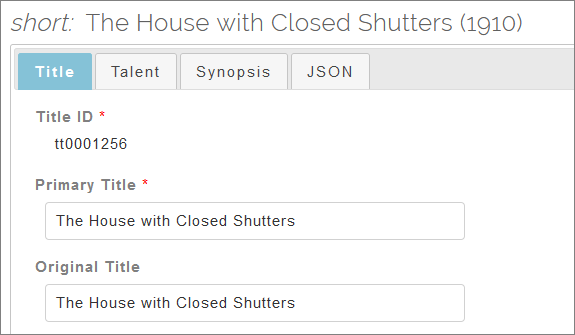
Each field can also display validation messages:
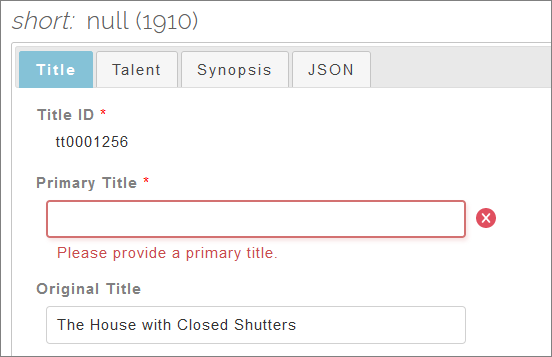
Altogether, one text field consists of:
- the field label (e.g. “Primary Title”)
- an optional red asterisk (for mandatory fields)
- the input field itself
- an icon indicating a validation error
- a related validation error message
Also, we may want different input fields to have different widths - a field designed to display a year is going to be much shorter than a field to designed display a movie title.
Another variation is that some fields (such as Title ID above) are part of an HTML form but are not directly editable - for example, they are the primary key value. We still want this value to be submitted to the server as part of the overall set of form data, so we want to support read-only input fields in our form, too.
In my application, I created a fragment of Thymeleaf markup to represent one editable text input field. You can see it in GitHub here - and also below:
|
|
That’s a lot of stuff for a simple text input field.
Take look at lines 4 and 5 above.
They declare this chunk of template to be a named fragment - and they specify six named parameters which can be passed in to the fragment. These parameters, along with other Thymeleaf processing, are used in the body of the fragment to control its final state - and how the Thymeleaf engine will convert it all to pure HTML, before sending it back to the user.
How do we use this fragment? Like this:
|
|
Here are our two text fields, each passing in the six parameters needed by the related fragment. You can see this in context, here in GitHub.
This is simple re-use - but highly effective. We now only need one fragment to define our text input, one for a drop-down, one for a checkbox, and so on.
Our complicated HTML text field has become a simple list of input values.
We have almost - almost - built a small HTML widget here - along the lines of widgets provided in libraries such PrimeFaces for JSF. Almost. But not really.
The Preprocessing Directive
The Thymeleaf preprocessing syntax takes re-use and flexibility one step further.
Consider this table:
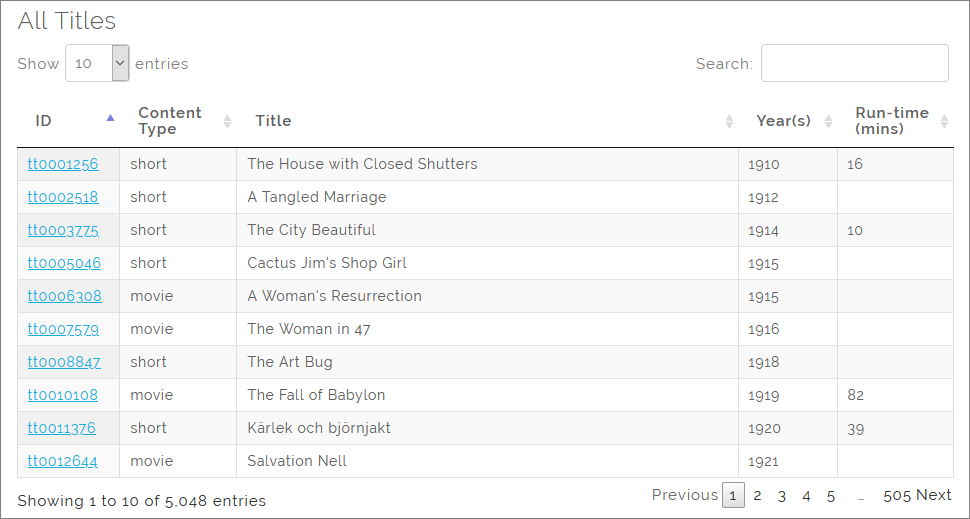
Just as we did for the text input field, we have a Thymeleaf fragment for the above table of titles. Here is part of that fragment, dealing with the table body - the data rows:
|
|
This fragment takes a list of ${resultBeans} and iterates over it to generate table rows. In the above example, each resultBean will be a Title object.
Nested within this process is another iteration using a list of ${rowValues} objects. This iterates over each cell in the current row. Each rowValue is a string matching a field name in the Title class:
- id
- contentType
- primaryTitle
- …and so on.
In this way, the above Thymeleaf fragment is completely generic. All references to Title objects and to rowValues are provided in model data, passed into the template, in the usual template-oriented way.
An example of the Thymeleaf preprocessor syntax is this:
"${resultBean.__${rowValue}__}"
Specifically, the __${rowValue}__ expression (denoted by double-underscores) is pre-processed, so that the above expression evaluates to each of the following, in turn:
"${resultBean.id}""${resultBean.contentType}""${resultBean.primaryTitle}"- …and so on.
These have now become standard Thymeleaf expressions to access Title getters, so that the related data can be displayed in each cell of a table row.
And More…
A couple of additional items to highlight in the above table body Thymeleaf fragment:
- It uses the synthetic Thymeleaf block tag, to support an additional level of iteration.
- It uses conditional logic, with an iteration status tracker, to format the first column as a link.
We can now re-use the above fragment for all our tables across the web site - which is exactly what the demo site does.
These features provide a great deal of processing power for our Thymeleaf templates. I can abstract away all the messy implementation details, and deal with much simpler structures to build my user interface.