
Attaching a Debugger to a Remote JVM
Table of Contents
In a Nutshell


Instead of using address=8000, use address=myhost:8000, where myhost is the fully qualified host name of the server where the remote JVM is running.

The Set-Up
I launched a new EC2 instance on Amazon AWS.
I installed Java:
|
|
I downloaded and unpacked a standalone Tomcat server:
|
|
I created a new setenv.sh file in Tomcat’s bin directory and made it executable using:
|
|
The file contains this:
|
|
On Windows the file would be setenv.bat and would contain this (where the /b flag causes the batch file to exit without closing the command window):
|
|

myhost with the actual hostname of your EC2 instance (or whatever server you are using to run Tomcat).
Starting Tomcat
When you start Tomcat using bin/startup.sh, you should see the following line at the start of the catalina.out log file output:
|
|
EC2 Network Configuration
Use the EC2 admin console to open network traffic for the required TCP ports.
In my case, those are:
8080- my Tomcat HTTP listener port.8000- the debug listener port.
For extra safety, allow only traffic from your PC’s IP address to access these ports.
Connecting the Debugger
In my case I used NetBeans. For this test, I did not actually debug an application, I just connected from my PC to the remote JVM running Tomcat on the EC2 instance. That is all I wanted to do to prove the set-up worked:
In NetBeans: Debug > Attach Debugger…
Select the following options:
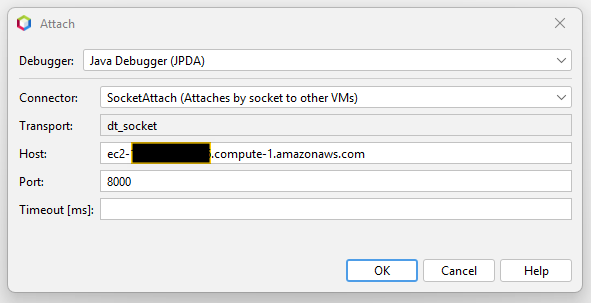
Provide the same host name that you used in Tomcat’s setenv.sh file.
Click on OK.
After the debugger has been attached, you can see the Tomcat processes displayed in the NetBeans “Debugging” tab:
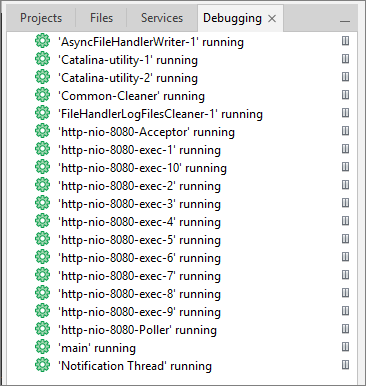
It’s a small step from there to setting breakpoints and stepping through the code for a servlet you have deployed to Tomcat.
Discussion
A lot of older tutorials will tell you to use the following:
|
|
Or they may even use the older flags -Xdebug and -Xrunjdwp (which you no longer need):
|
|
This uses address=8000 - just the port number, no host name or IP address.
This used to work OK for remote connections in older versions of Java - for example, for Java 8:
In contexts where a server is waiting for a client to attach, the address consists of the port number alone (the host name is implicit).
But in more recent versions of Java - for example, Java 21:
addresses have the format
<host>:<port>… If<host>is empty, the local loopback address is used.
In other words, the older “implicit” host name approach has been removed in favor of needing to specify the specific host name, if the JVM is waiting for a debugging connection from another machine (such as your PC).
If you are running everything locally (your IDE and your Tomcat), then this is irrelevant - you can use address=8000. That defaults to using the loopback address (which is equivalent to address=localhost:8000).