
SSL/TLS Certificates Using Let's Encrypt
Table of Contents

Introduction


You can generate free SSL/TLS certificates from AWS using their Certificate Manager (ACM) - assuming you have an account already, of course. They even provide wildcard certs.
The catch is: You can only use these certs within the AWS ecosystem. There is currently no way to download the private key for a public certificate:
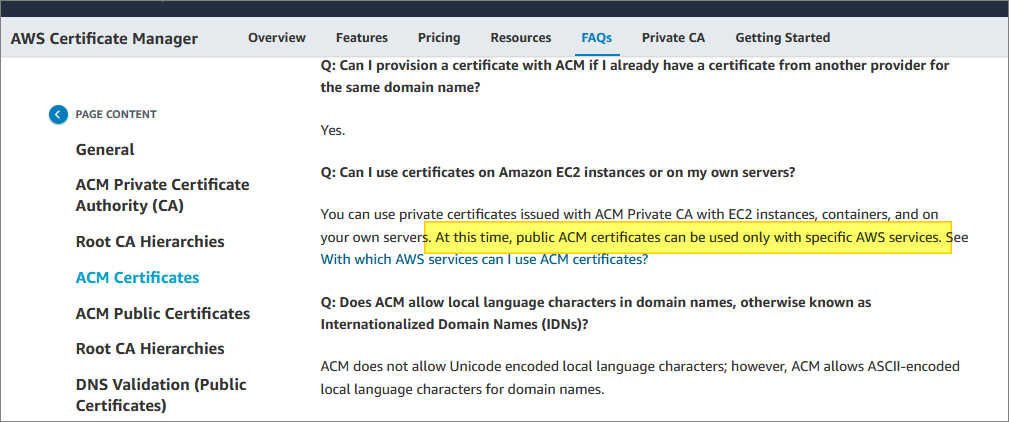
This means you cannot deploy one of these free certificates onto a server of your choosing. If you’ve gone serverless, then great - you probably don’t care.
The AWS Cognito Problem
Recently, I encountered a scenario where I really wanted my own wildcard cert, for use with an AWS service - specifically Cognito for user sign-in. I had an existing web site, where I wanted to delegate sign-up, log-in, password handling, password resets, two-factor authentication, and so on, to Cognito.
Cognito provides a login page (and sign-up page, and so on), which you can integrate into your web site. This requires Cognito to use a subdomain - either provided by AWS, or based on your domain name.
I didn’t like the effect of having a login URL which looked significantly different from the main domain’s URL. To users (assuming they notice), that would be somewhat jarring - and maybe even enough to deter them from signing up, or logging on.
Cognito lets you use your own domain’s URL - as long as your certificate supports subdomains (I’m assuming SSL/TLS throughout, here).
So for example, assuming I have this domain for my website:
example456 dot com
I have two basic choices for managing the URLs for those Cognito pages:
Option 1: Use the Cognito-provided domain - which I can customize to my needs, to some degree:
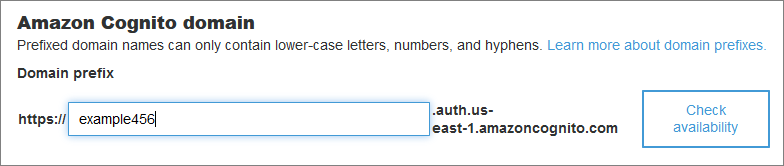
This gives me the following base URL for Cognito pages:
example456.auth.us-east-1.amazoncognito.com
That’s what I mean by “jarring”: A user logs on to my URL, follows the “Log In” link - and sees this unexpected URL.
Option 2: Use my own domain with its own certificate:
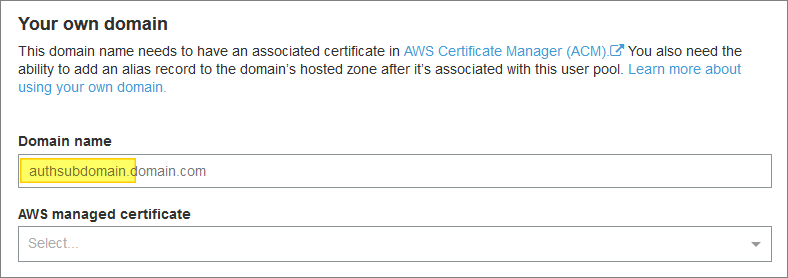
Note the above prompt for “Domain name”. It’s actually a subdomain that they are asking for.
A typical value would be something like this:
auth.example456 dot com
You can use whatever you want in place of “auth”, of course.
Important note: Because Cognito needs a subdomain (that “auth” part), our certificate has to support that subdomain. Basic certificates typically only support the core domain name and its “www” variant: example456 dot com, www.example456 dot com
Coming back to my Cognito example, I have two sub-options within option 2:
Option 2a: I can get one of those free wildcard certs from Amazon (see earlier), and use that. Using a wildcard cert will allow me to use whatever subdomain I want for my Cognito domain name (auth or anything else). But, as we noted earlier, I can only use this cert within some specific AWS services. I can’t use it in my web server - even if that web server is running on an Amazon EC2 instance.
Option 2b: I can get my own wildcard cert (or whatever type of cert lets me have the subdomain I am going to need) from another cert provider, and import that cert into AWS Certificate Manager:
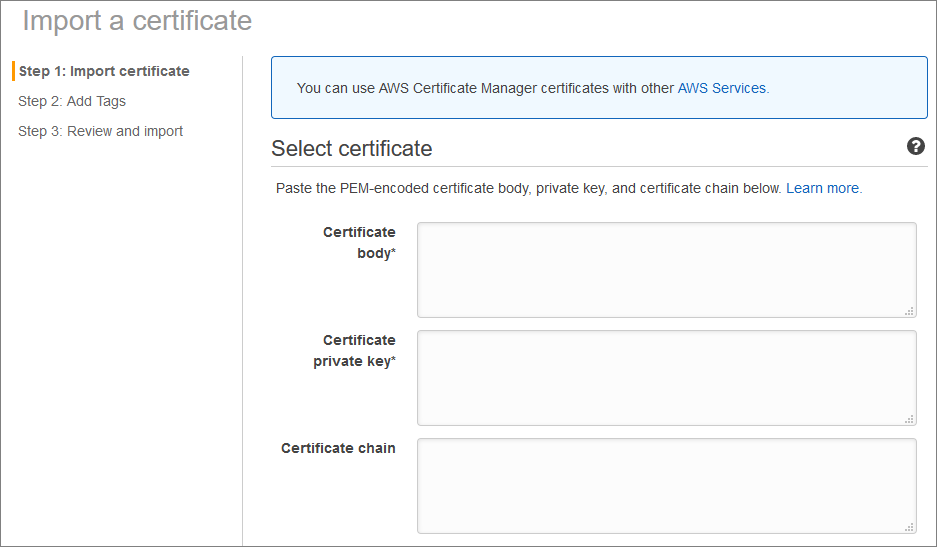
With this option, I get the best of both worlds - I can use my certificate on any server I choose, and I can use it with Cognito to give me unsurprising URLs for my login functionality.
The "Costs a Lot of Money" Problem
Buying your own certificate can get pricey (relative to a price of “free”). Wildcard certs can cost an additional premium:
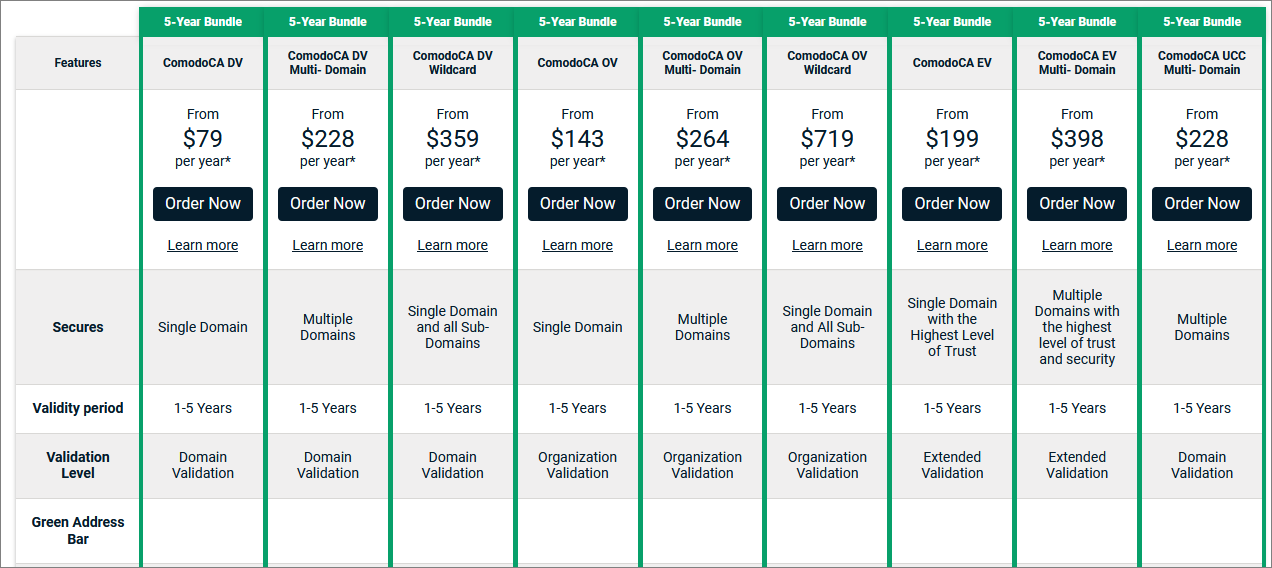
I’m not picking on Comodo here - there are other more expensive - and less expensive - cert providers out there. But I don’t want to pay $359/year (or even $228/year) for five years, for this privilege.
Even if someone else is paying (a corporation, say, where this amount is only a rounding error on top of a rounding error), I still want to spend as little of their money as I can.
Let's Encrypt
Free as in beer, and as in speech.
Let’s Encrypt is a Certificate Authority (CA) which provides SSL/TLS certificates free of charge.
Furthermore, there is a certificate management agent (certbot), maintained by the EFF, which can help you automate the end-to-end process of obtaining and maintaining your Let’s Encrypt certificates. This includes wildcard certificates, by the way.
One thing to bear in mind is that their certificates expire after 90 days - so that automated renewal process is important. In fact, Let’s Encrypt recommends renewing their certificates every 60 days.
They don’t provide Organization Validation (OV) or Extended Validation (EV) certs - they focus on domain-validated (DV) certificates - where you can prove ownership of the domain, for example, by adding records to its DNS configuration.
Did I mention that it’s free? And here are some graphs, and other stuff.
Wildcard Example
There are many ways to configure and run certbot - but there are also some limitations.
- certbot does not run on Windows
- certbot does not run on the AWS AMI flavor of Linux (at least not in any straightforward way that I was able to figure out)
- it typically works with existing installations of app servers such as Apache2 and Nginix, running on the more common flavors of Linux/Unix
Some web hosting services also provide built-in support for Let’s Encrypt. That includes AWS Route 53, by the way.
In my case, I don’t typically use Apache or Nginix - and I do typically use AMI. So, on both counts I was out of luck.
However, it was still relatively straightforward to get what I wanted - a free wildcard cert for my domain - using the following steps:
- Provision a new Ubuntu instance on EC2 (a t2.micro running version 18).
- Configure a basic Apache web server.
- Install certbot.
- Follow the certificate generation process.
Once I had the certificate files and key, I no longer needed the Apache web server - or the Ubuntu instance, for that matter. But, for the sake of easier renewal, I do need to keep these available.
Here are the details:
The instructions provided by the Certbot web site are at the below URL (you can select options other than Linux and Apache, if you prefer):
https://certbot.eff.org/instructions?ws=apache&os=snap
My DNS provider is not on the official list of supported providers - so I have to follow some extra manual steps to prove that I do in fact have control over my domain.
These manual steps require the use of an additional certbot plug-in (the manual plug-in).
The manual plugin also offers options so that you can use certbot even if it is not installed in the actual server which will be hosting your domain.
Installation on Ubuntu
Add the certbot personal package archive (PPA):
|
|
Install certbot:
|
|
Install the DNS plug-in (not relevant for me, but here is an example):
|
|
Domain Ownership
The following command starts the domain verification and cert generation process. This is where I have to use the manual plug-in, by specifying the certonly subcommand and --manual option:
|
|
I could have also specified a --preferred-challenges option, to control the process for verifying domain ownership.
The http challenge will ask you to place a file with a specific name and specific content in the /.well-known/acme-challenge/ directory directly in the top-level directory (“web root”) containing the files served by your webserver. I will show an Apache example of this below.
When using the dns challenge, certbot will ask you to place a TXT DNS record with specific contents under the domain name consisting of the hostname for which you want a certificate issued, prepended by _acme-challenge.
For example, for the domain example.com, a zone file entry would look like:
_acme-challenge.example.com. 300 IN TXT "gfj9Xq...Rg85nM"
Domain name providers all have their slightly different tools for maintaining DNS records for your domain. So, the specifics will depend on the provider you used when purchasing your domain name.
I was prompted to respond to both the dns and http challenges. I will walk through an example below, but first some notes on Apache, since I needed that for the http challenge.
Apache Set-Up
Setting up a running Apache2 server on my new Ubuntu OS was straightforward. Because I needed this to help with the domain ownership challenges, here are some notes:
|
|
(I also had to point a DNS A record to the public IP address of the Ubuntu image. I did this in the DNS admin tool provided by the company where I registered the domain name.)
After this, a website was up at http:// example456 dot com/index.html - displaying the default Apache2 welcome page.
The web site was hosted from /var/www/html
To respond to Certbot’s http challenge (see next section below), I needed to create a static file:
|
|
I then placed the requested content in this new file (see next section below for the Certbot request for this).
I then checked that this new file was being served by Apache at the expected URL:
http:// example456 dot com/.well-known/acme-challenge/-xfRE-3Uwpya7iausI41...IE0Vsgv\_Ik
Certbot Output
As noted above, the certbot command I used to create my wildcard certificate was this:
|
|
I was prompted to enter an email address, and to agree to terms of use. The email address will be used for reminders about upcoming cert expirations, so it’s worthwhile to provide a valid address here.
Next, I was challenged to verify DNS ownership through the following test:
Please deploy a DNS TXT record under the name
_acme-challenge.example456.com with the following value:

EjIfpdEN8...KvpqP0eK_E_I

Before continuing, verify the record is deployed.
Then, I was challenged to create a static file, to be served by Apache:
Create a file containing just this data:

-xfRE-3Uwpya7iausI...V_BB8Wv9eJ2utIE2e6TE

And make it available on your web server at this URL:

http:// example456 dot com/.well-known/acme-challenge/-xfRE-3Uwpya7iausI...IE0Vsgv_Ik

(This must be set up in addition to the previous challenges; do not remove,
replace, or undo the previous challenge tasks yet.)
After completing both of the above challenges, I got this:
Waiting for verification...
Cleaning up challenges

IMPORTANT NOTES:
 - Congratulations! Your certificate and chain have been saved at:
   /etc/letsencrypt/live/example456 dot com/fullchain.pem
 - Your key file has been saved at:
   /etc/letsencrypt/live/example456 dot com/privkey.pem
 - Your cert will expire on 2020-02-30. To obtain a new or tweaked
   version of this certificate in the future, simply run certbot
   again. To non-interactively renew *all* of your certificates, run
   "certbot renew"
Using The Certificate
I used Apache to verify the validity of my new certificate.
First I had to activate SSL for Apache:
|
|
Then I had to add a new virtual host to the default Apache config file (under /var/www/html) - just the basics for this test:
<VirtualHost *:443>
    DocumentRoot /var/www/html
    SSLEngine on
    SSLCertificateFile /etc/letsencrypt/live/example456 dot com/cert.pem
    SSLCertificateKeyFile /etc/letsencrypt/live/example456 dot com/privkey.pem
    SSLCertificateChainFile /etc/letsencrypt/live/example456 dot com/chain.pem
</VirtualHost>
I verified the config changes with this:
|
|
I restarted Apache:
|
|
Since my server was an AWS EC2 instance, I also needed to open port 443 in the AWS admin console.
After this I was able to switch to using https for my URLs.
I also used these online tools for SSL/TLS verification (recommended for health-checking any URL):
https://tools.keycdn.com/http2-test
https://www.ssllabs.com/ssltest/analyze.html
Certificate Renewal
How you implement automated renewal may depend on how you initially generated your certificate.
The simplest way is to place the following command in crontab, and run it once a week:
|
|
It won’t do anything if your certificate is not coming up for renewal. You can also manually check the expiry date of a certificate by hitting the URL:
|
|
Or by inspecting the file:
|
|
You can also check how close a cert is to expiration using the openssl -checkend n where n is the number of seconds to expiration.