
AWS Cognito - Signing Up and Signing In
Table of Contents
Overview


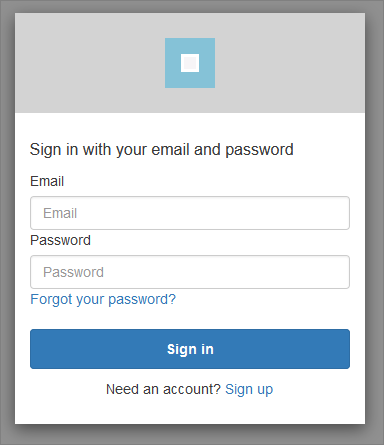
In this walk-through I will take a look at AWS Cognito for user sign-up, password management and access controls. I’ll use a basic Java web application to demonstrate how to leverage Cognito’s sign-in (i.e. login) API, including its out-of-the-box (but customizable) web components, such as this:
I’ll make some assumptions, such as a basic familiarity with using AWS services and accounts. It will also help to have some familiarity with OAuth 2.0 (typically abbreviated to oauth2).
But first - what’s the problem I’m trying to solve, here?
What's the Problem?
I think there are a couple, at least.
Password management: I would prefer not to manage passwords in my application, if possible.
I could write some custom code to ensure passwords are salted, hashed, and stored securely - to be specific, the hashes get stored, while the passwords are never stored anywhere in my app, or my database.
I could ensure that each password gets its own salt, to help mitigate against certain types of attack. And that the encryption process is iterated a few thousand times to combat the ever-increasing speed of CPUs/GPUs.
I could go to lengths to manipulate passwords in char arrays in my code, and never in strings - and for as little time as possible before they are hashed… and garbage-collected.
That doesn’t sound too bad….
But then there is also authentication infrastructure management. I could add logic to manage forgotten passwords, forgotten user IDs, e-mail and phone number verifications, account lockouts, two-factor authentication options, password length and complexity rules, SMS integration, OpenID support, oauth2 flows, LDAP integration, identity federation…
This is starting to get complex. And I have not even begun to consider authorization - closely related to authentication: Which users can have access to which pages and resources in my web site?
There are various solutions out there - for example Apache Shiro. But here I will focus only on Cognito.
Which Parts of Cognito?
Cognito is large. Broadly it consists of:
- Cognito User Pools: sign-up, sign-in and account management functions.
- Cognito Identity Pools - for managing temporary access to other AWS services.
- Cognito Sync (which appears to have been superseded by AWS AppSync).
You may see the acronym IDP in places - which stands for “IDentity Provider”. So, for example, “Cognito IDP” refers to the Cognito User Pools functionality.
I will be looking only at User Pools in this post. But here is a good starting point for more general exploration.
And for developer-oriented resources, start here.
Within the scope of User Pools, there are several different technical ways to interact with Cognito:
a) The CLI - command line interface tools. Here is a list of available commands.
b) User Pools API - with a list of operations described here. This is a comprehensive REST API.
c) Mobile SDKs - Android example here - for Android iOS, app development etc.
d) Language-specific SDKs (e.g. C++, Java, Python, etc.). For example:
- Here is the AWS SDK for the Java 2.0 Developer Guide.
- And here are the related Javadocs. Current version at time of writing: 2.1.30.
e) A specific JavaScript module for Cognito, based on AWS Amplify Authentication.
f) Cognito’s own authentication server, including a small set of API endpoints to support user pool authorization.
g) The Cognito Dashboard - part of the AWS set of online dashboard tools (you need an AWS account and login to access this). This is where the hosted UI can be found (see the screenshot at the start of this article).
As you might expect, all these various technologies provide a set of building blocks which can be combined in variety of different ways, depending on your needs. To give you a flavor, some common scenarios are described here.
Demo
I will be using the following components for my demo:
- Item (g) - the Cognito Dashboard, to manually configure a new User Pool.
- Item (f) - the hosted authentication server - specifically using an oauth2 flow to navigate the hosted Cognito user interface (sign-up and sign-in web pages).
- Item (d) - the Java SDK to demonstrate some additional User Pool admin functions.
- A small Java-based web application with which the hosted Cognito UI will be integrated.
- A registered domain for my demo web site - but this is optional. If you don’t have your own domain, you can use the domain of the Cognito authentication server instead.
The code for my demo is available here in GitHub.
The demo covers simple web-based login, sign-up and logout functions, based on a user’s e-mail address and password. As a part of this we also get e-mail ownership verification and password resets. (The demo could easily be extended to cover additional features such as 2FA, simply based on how the Cognito User Pool is set up).
In my demo web site, a basic set of authorization groups has also been created (based on Cognito groups). The demo uses these groups to control access to different parts of the website. For example:
- A user who is not logged in can only reach the welcome page.
- A user who is logged in can reach an additional page.
- A user who is logged in and belongs to a specific group can reach another additional page.
- A user who is a member of the “admin” group can access every page.
Setting Up a New User Pool
This assumes you already have an AWS account and can access the Cognito admin dashboard.
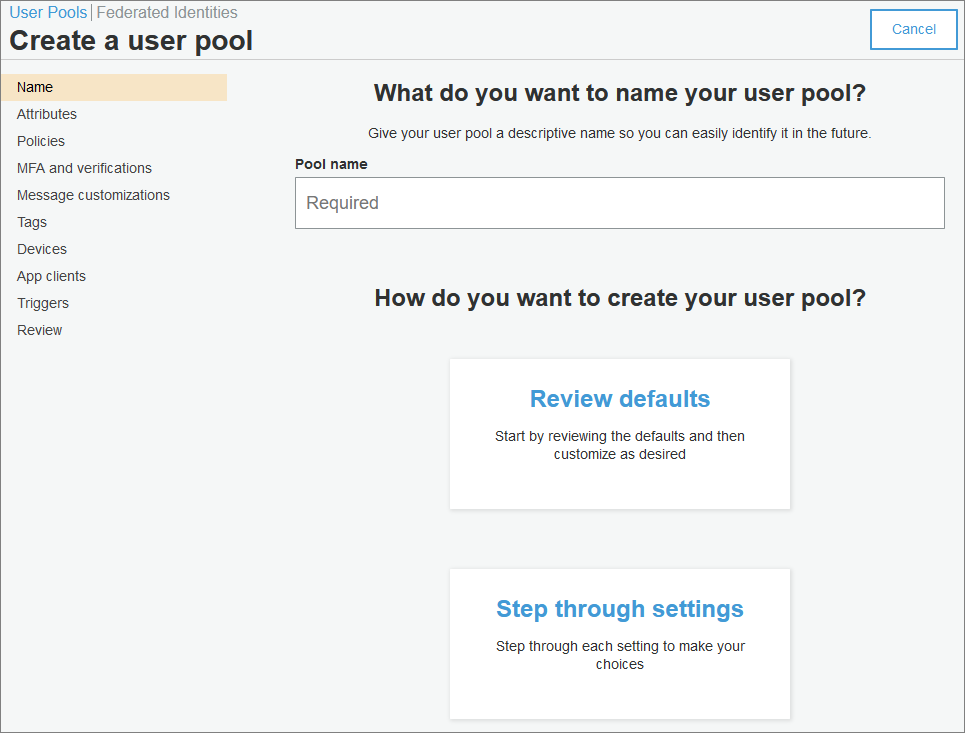
The process for creating a new Cognito user pool is relatively straightforward. Start here and follow the “step through settings” option.
If you don’t like the results, you can easily delete a pool and start again:
Attributes: In this step, remember that you cannot change your attribute selections after the pool has been finalized and created. For my demo, my pool uses these attributes:

Policies: Make sure you choose a sufficiently long minimum length for passwords. 8 characters won’t cut it any more - even with the full compliment of numbers, letters (upper and lower), and symbols. 16 characters, please, at least! At least until quantum computing is truly here, and we’re all hacked.
(And if the password allows spaces, you can use a passphrase more easily. And use a different password for each application. And keep your passwords in a password safe… I could go on… If you want to have a scare, take a look at this site. And DO NOT use your real passwords there, of course!)
I chose to allow users to sign themselves up (but in my case, because of authorization groups, a signed-up user still has only limited access to pages within my web site).
Alternatively, you can choose to have an administrator review all account creation requests, before a user is created. This is a great option for “invitation only” web sites, or where anyone can have read-only access to the site, but where only approved users can log in and make data changes.
MFA and verifications: In my pool, because I did not select “phone number” as one of my attributes, I do not have any support for SMS.
I chose to have all e-mail addresses verified (the typical process is followed, whereby the user is sent an e-mail and must click on a link in the e-mail to demonstrate control of the e-mail account).
Advanced security: I skipped this.
Message customizations: I chose to use Amazon SES for my e-mails. Setting that up is straightforward, but outside the scope of this post.
Tags: I skipped this.
Devices: I chose “no” - I do not want to remember my users’ devices.
App clients: We need at least one app client to be set up here. You need an app client ID, so you can use it as a parameter in your API calls (which we will get to later).
It’s worth taking time to look at the Auth Flows Configuration options. I chose these:
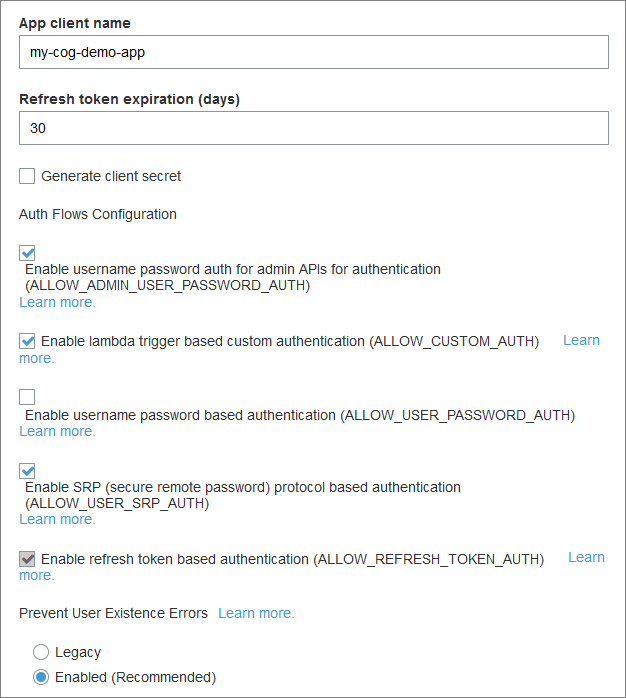
Also, click on the “Set attribute read and write permissions” to adjust those, if needed.
Triggers: I skipped this. But this is where, for example, you would add custom logic to validate sign-up fields. It’s done using AWS Lambda functions - out of scope for this post.
Analytics: I skipped this.
App client settings: For callback URLs and oauth2 settings.
Callback URLs
This is where we provide callback URLs for various actions. The URLs listed here are basically those which my application is allowed to use in its code.
For example, one of the callback URLs shown below is:
http://localhost:7000/log-in-result
This URL is used in my demo (testing) application as the location to which Cognito redirects, upon completion of the login process. It is passed to Cognito as a query parameter.
(By the way, URLs for “localhost” resources are exempt from the rule that all Cognito URLs must be HTTPS. That is the only exception Cognito allows.)
The full URL by which the login page is invoked from my demo app is this (broken up & summarized for readability):
https://auth.northtechwork.com/login;jsessionid=n1428...x?
response_type=code&
state=lu3w4…UHNM%253D&
client_id=42fv…vq46t&
redirect_uri=http://localhost:7000/log-in-result
Note that in the above example, one possible oauth2 parameter - scope - is missing. In the oauth2 spec, this parameter is mandatory - but for AWS Cognito, it is optional:
If the client doesn’t request any scopes, the authentication server uses all scopes associated with the client.
In my examples here, I do not request any explicit scopes - therefore they are all used by Cognito.
An example of providing explicit scopes in your login query parameters would look like the following example:
scope=openid+profile+aws.cognito.signin.user.admin
See the next section for more details.
OAuth 2.0 Settings
My pool example shown below has more oauth2 options selected than it actually needs:
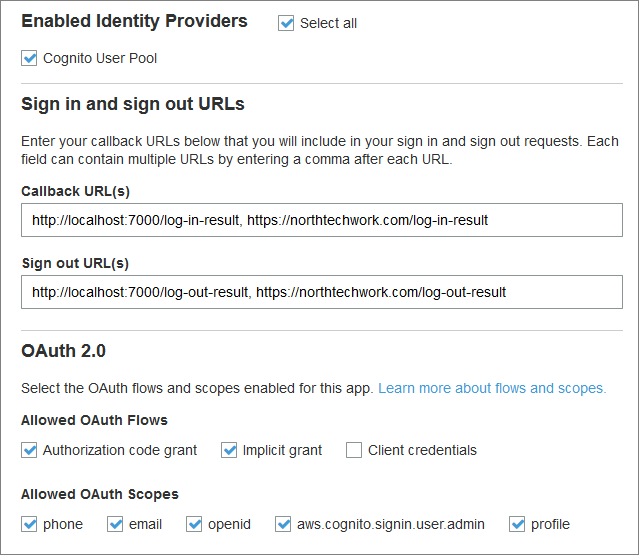
My demo specifically only uses an “authorization code grant” flow.
For that scope parameter discussed above, Cognito gives the following guidelines:
An ID token is only returned if an openid scope is requested. The access token can only be used against Amazon Cognito user pools if an aws.cognito.signin.user.admin scope is requested. The phone, email, and profile scopes can only be requested if an openid scope is also requested. These scopes dictate the claims that go inside the ID token.
Therefore, putting all this together, the above example does not need (because we do not use) the “implicit grant” flow.
Other Settings
Domain name: There are two options:
-
Use your own domain.
-
Use the AWS Cognito domain.
Option (1) involves several steps which are outside the scope of this post. You can read more about the process here. The critical things to note here are that (a) your domain must support at least one subdomain (e.g. auth.yourdomain.com or similar), and (b) you must be using HTTPS. A wildcard SSL/TLS cert will cover you.
In my demo I used option (1) - but you can happily use option (2):
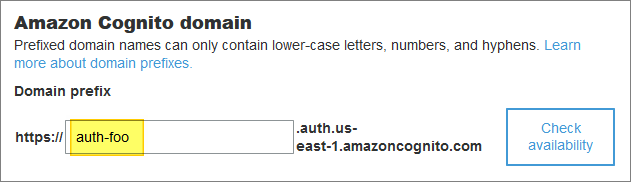
The downside of using the AWS Cognito domain is that your URLs will look a bit untidy (login pages will refer to auth-foo.auth.us-east-1.amazoncognito.com instead of purely using your own domain name.
UI customization: I added a logo - that was my only customization. But the general idea is that you can make the Cognito sign-on and sign-up pages blend in with the look and feel of your web site, here.
Resource servers: I skipped this.
Federation: I skipped these.
After saving my new pool, I made a note of the assigned app client ID (see above).
I then selected the Users and groups option. There are two tabs - “Users” and “Groups”. Not surprisingly.
In the Users tab, you will see that there are no users created yet. We will use my demo web app to create a couple of new users, later. But you will also see that you can bulk-import users and manually create users directly in the Artem dashboard, if you need to.
In the Groups tab, I created the following basic groups - with no attributes apart from group names:

These groups will be used in my demo web application to help manage user authorizations (also referred to in the application as user roles).
Back on the App client settings page, at the bottom of the page, you can see a link to “Launch Hosted UI”. This gives you a preview of the login page that you will be using (and that I integrated into my demo application).
If you change the “login” segment of the URL to “signup”, you can also display the sign-up page - which in my app looks like this:
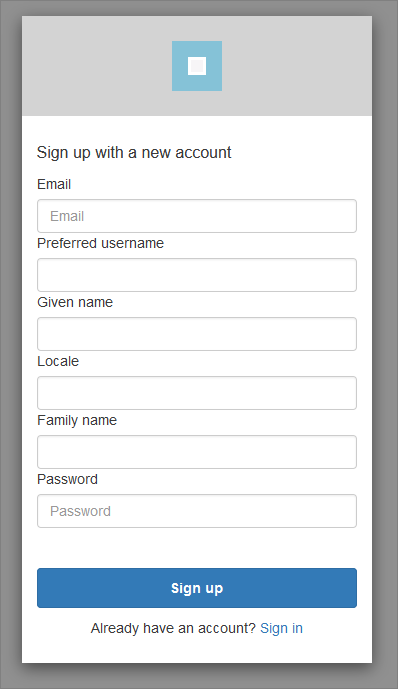
The URLs for each of these pages are worth a closer look - especially their query parameters. (The sign-up page shares the same query parameters as the login page.)
You can see an explanation of the login URL query parameters here:
https://docs.aws.amazon.com/cognito/latest/developerguide/login-endpoint.html
The Demo App - Sign-In Flow
The demo app displays a simple “welcome” page:
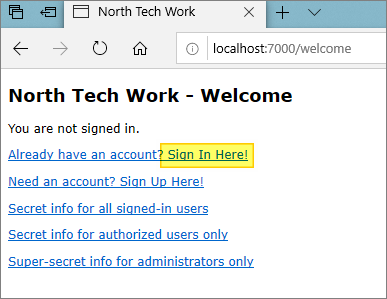
The page includes a “sign in here” link which initiates the sign-in (log-in) process. The process used by the demo is a simplified version of the oauth2 “authorization code grant” flow.
The oauth2 Authorization Code Grant Flow
This is not an oauth2 tutorial, and others can explain oauth2 - and its various flows - far better than I can. For example, this is a great overview. There are also many diagrams out there - for example, this one. I like the summary provided there:
Authorization Code Flow: This is the flow defined in RFC 6749, 4.1. Authorization Code Grant. A client application (a) makes an authorization request to an authorization endpoint, (b) receives a short-lived authorization code, (c) makes a token request to a token endpoint with the authorization code, and (d) gets an access token.
And here is the official spec with an ASCII art diagram.
Back to the Demo…
In our demo we’ll be receiving a user token, not an access token - see step (d) above. This token will contain all the user-related information for a successfully logged-in user. We are doing the bare minimum of processing to get our users logged in.
The following steps are executed:
-
The link’s target URL points at Cognito’s authentication server. When it is clicked, it displays the “sign in” page (as previously shown above).
-
The client ID, which is contained as a query parameter in the sign-in URL, is used by Cognito to locate the correct Cognito User Pool.
-
A user enters their sign-in credentials - which in this demo’s case consist of an e-mail address and password. Of course, the specifics will depend on how the related Cognito User Pool was set up.
-
Assuming the credentials match those of a user in the user pool, an HTTP 200 “success” response is returned from Cognito to the redirect URL provided, with additional information added by Cognito, as query parameters.
(The response also includes the same “state” value as provided by the sign-in URL. This will be used by the demo application to verify that the response has not been hijacked. You can see this in GitHub here.)
The “success” response also contains a new value: an authorization code.
-
The demo application has a handler for the redirect URL, which you can see inGitHub here. This handler extracts the authorization code from the response URL.
-
The demo application then exchanges the authorization code for a user token, by issuing an HTTPS POST to the Cognito TOKEN endpoint. Again, this is part of the oauth2 “authorization code” flow we are using. You can see this happening in GitHub here.
(If you are interested, you can read the official oauth2 documentation here.)
-
The demo application receives the user token. This is a JSON web token, whose format is described here. The token contains Base 64 encoded information about the Cognito user who just signed on. The demo application decodes the token (see here in GitHub), and then parses the resulting JSON.
-
The demo web application now has confirmation of which user successfully signed in to the application. The “welcome” page is finally re-displayed to reflect this:
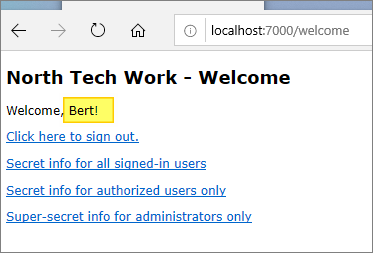
Now, the user is greeted by their preferred name (as extracted from the user token). The sign-in and sign-up links have been replaced by a sign-out link.
Simple!
The sign-up flow is very similar to the sign-in flow, with a couple of extra steps (e.g. e-mail verification - all handled transparently by the Cognito authentication server on our behalf).
Two Areas for Improvement
The demo code is not production-ready.
Client Libraries
The demo’s authentication processing does not use any code libraries to support the oauth2 flow. There are at least 2 areas where such libraries might be useful - and the demo code might be refactored:
- an HTTP library, such as the Apache HTTPClient library.
- an oauth2 client library - there are several to choose from.
Our demo is basic, and its code doesn’t do much to handle errors or failures in HTTP or oauth2 responses.
Session Timeouts
The demo web application does not handle session timeouts in conjunction with logged in accounts. Additional logic would be required to clean up logins upon session expiration. (This is only handled in the demo by a user explicitly clicking on the “sign out” link).
Using the Java API for Admin Functions
In addition to using oauth2 to interact with the Cognito authentication server’s web pages, the demo also shows how to use the separate Java API to access Cognito data.
Specifically, it demonstrates how to list all users in the related Cognito user pool.
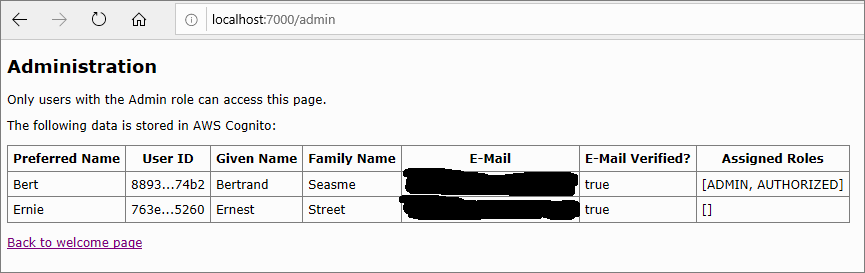
This is a read-only function, but could be extended to include any action which a user can execute directly in the AWS Cognito admin console.
One possible use case is to allow a web site’s administrator to perform actions without needing to log on to the Cognito console - for example, to deactivate an account.
The core class used to interact with a Cognito user pool is CognitoIdentityProviderClient.
The following code, which can be found here in GitHub demonstrates one use of this core class - to extract the list of users, as shown in the above screenshot:
|
|
Conclusions
That was a quick run-through - just scratching the surface of Cognito’s features. But from here it’s relatively easy to extend the functionality to provide extra features such as two-factor authentication, and so on.
But most of all, it helps to get me off the hook for password management.
More broadly, there appears to be no small amount of controversy surrounding oauth2. Is it safe to use? The answer is, it can be - but it’s easy to get wrong.